This post may contain affiliate links. By browsing this website, you agree to our disclaimer, privacy policy, and terms of use.
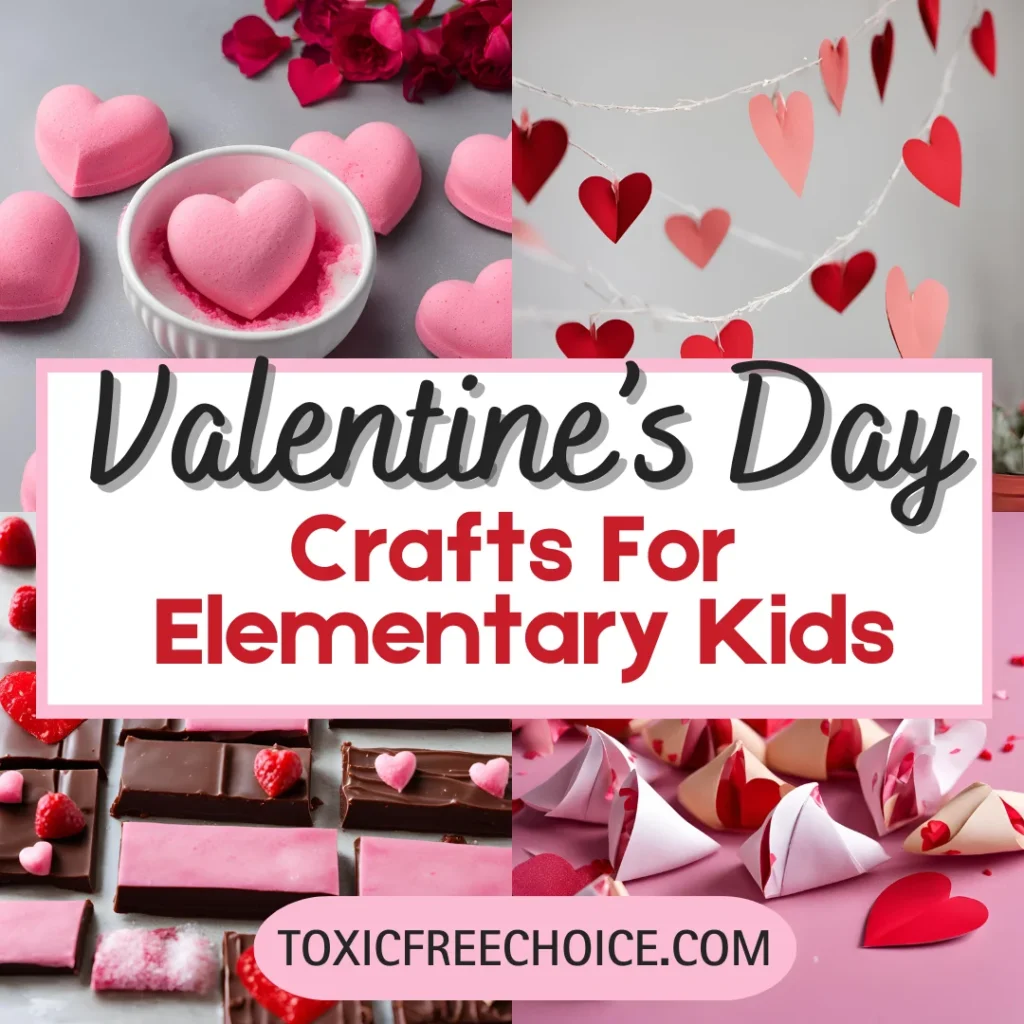
This guide to homemade Valentine’s Day gifts is perfect for families looking to create meaningful, heartfelt treasures while making precious memories with their children.
From simple preschool projects to more advanced teen crafts, you’ll find creative ideas that celebrate love and creativity at every age.

The most treasured Valentine’s Day gifts aren’t the ones with fancy price tags from the mall – they’re the ones crafted with love, imagination, and maybe a little glitter by tiny hands and caring hearts.
Sitting together as a family at the kitchen table surrounded by paper scraps and glue sticks, we’re building so much more than just pretty cards or picture frames. With every cut, paste, and giggle, kids are growing important skills like creativity, thoughtfulness, and patience.
They beam with pride as they put the finishing touches on a gift for Grandma, knowing it will make her smile. And those little moments of kindness and consideration? They’re the building blocks of empathy.
Best of all, in the midst of heart-shaped chaos, we’re also making memories to cherish long after the glitter is vacuumed up. The joy of giving homemade Valentine’s Day gifts, made with love and care, is something your children can carry in their hearts forever. No store-bought teddy bear can compete with that!
So this year, I invite you to join me in skipping the shopping and making one-of-a-kind Valentine’s Day crafts with your kids instead. In this article, I’ll share some of my favorite project ideas for all ages, along with tips for creating a fun, safe crafting space. Let’s make this a Valentine’s Day to remember!
More Than Making Gifts- The Benefits of Making DIY Valentine’s Day Gifts With Your Kids
Supports Cognitive Growth
Craft time is so much more than just about the crafts. Crafts can actually help your kiddos develop important critical thinking skills while they create.
As they carefully plan out how to fit all of the decorations on a small card, or the spacing being decorations on a garland – they are problem-solving in real-time.
According to child development experts, these kinds of hands-on creative activities strengthen neural connections that support learning and cognitive growth.
Builds Confidence
There’s something special about watching your child carefully consider what would make Grandpa smile, or seeing them beam with pride when showing off their finished creation.
Crafting helps to build confidence by:
- Reinforcing a stronger sense of empathy as they think about others’ preferences.
- Growing confidence in their abilities.
- Genuine pride in their accomplishments.
- Healthy ways to express their emotions through art.
Learning to Work Together and Share
If you’re crafting with multiple kids, siblings, or friends, it’s also a great time to practice social skills. Your kitchen table can become a little workshop where important life lessons unfold naturally, like:
- How to communicate their ideas clearly.
- The joy of sharing supplies and helping each other.
- The meaningful act of giving to others.
- Patience while waiting for glue to dry or taking turns with tools.
The Gift of Time Together
But perhaps the most valuable part isn’t even the gift itself – it’s the quality time spent making it together.
Those moments of sitting at the kitchen table, surrounded by craft supplies, sharing stories and giggles while we work on our projects – that’s where the real heart of Valentine’s Day lives.
Here are some of my favorite homemade Valentine’s Day gifts to make with kids categorized by age and ability. Do note that some of these crafts do require elements where parents should step in to assist.
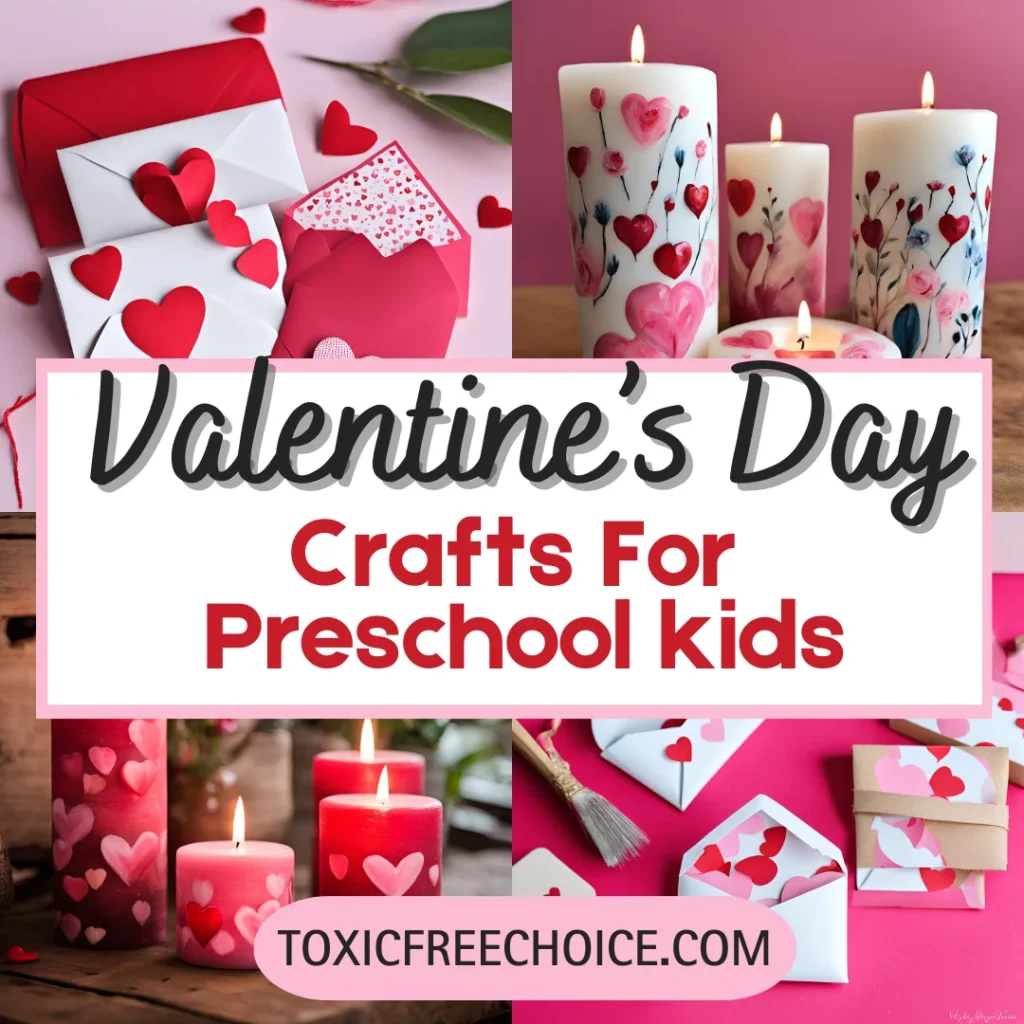
Super Easy Crafts For Kids (Age 3-6)
1. DIY Heart Frame
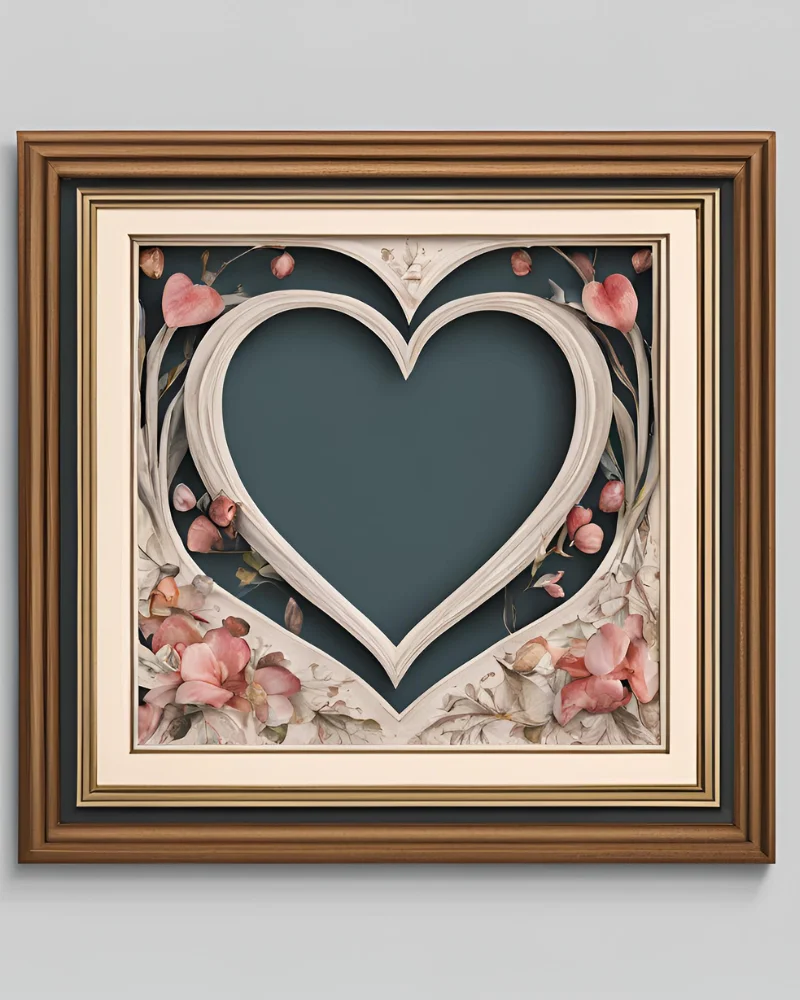
Transform a favorite photo into a heartfelt keepsake that’s perfect for grandparents, teachers, or anyone special in your child’s life. The personalized touch of a handmade frame makes this simple craft feel extra meaningful.
Safety Notes
- Adult supervision is required for using a craft knife
- Keep small items like stickers away from very young children
- Work on a protected surface
Materials
- Picture frame (8.5″ x 11″ recommended)
- Thick card stock or watercolor paper
- Ruler
- Heart-shaped stencil or cookie-cutter
- Craft knife (for adult use only)
- Cutting mat
- Photo
- Tape
- Optional decorations (markers, stickers, stamps)
Helpful Tips
- Choose a photo that will fit well within heart shape
- Test stencil placement before tracing
- Keep decorations away from frame edges
- Clean glass before final assembly
2. DIY Mini Valentines Envelopes

Recreate the nostalgic charm of classroom Valentine’s exchanges with these adorable miniature envelopes. They’re perfect for tucking in small love notes or treats, making gift-giving extra special and personal.
Safety Notes
- Watch for paper edges that might cause small cuts
- Supervise the use of scissors if needed
- Keep small items away from very young children
Materials
- Square origami paper (9.5″ x 9.5″) or cut paper
- Pencil or ruler
- Scissors (optional)
- Small heart stickers for sealing (optional)
Helpful Tips
- Use patterned paper for extra flair
- Pre-fold paper for very young children
- Add heart stickers to seal envelopes
- Make several at once for multiple recipients
3. Hand Painted Valentine’s Day Candles
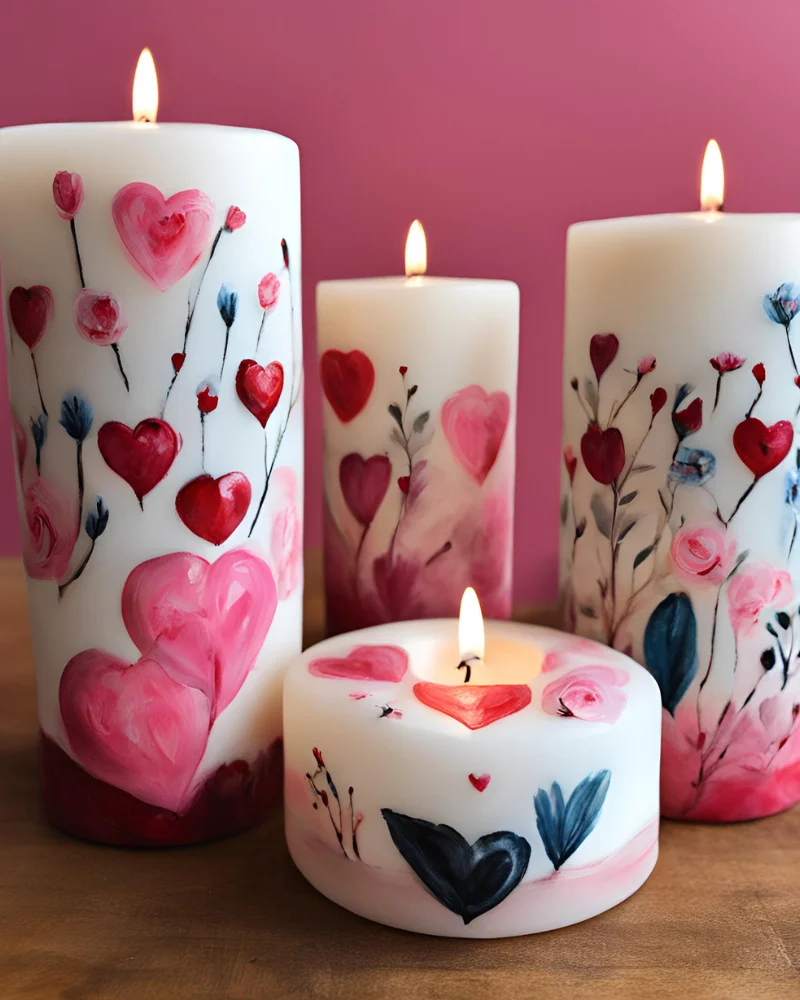
Transform simple candles into personalized works of art that bring warmth and light to any room. You can use pillar candles for smaller hands or taper candles for older kids, but try to find a fragrance-free, non-toxic candle made with high-quality clean burning wax, like beeswax or coconut wax.
Safety Notes
- Adult supervision is required at all times
- Never light candles during crafting
- Use washable, non-toxic paints
- Protect work surface
Materials Needed
- Plain candles (beeswax or coconut wax recommended)
- Non-toxic acrylic paint or paint pens
- Paintbrushes (various sizes)
- Protective surface covering
- Paper towels
- Optional: decorative ribbon
Super Fun & Easy Crafts For Kids (Age 6-10)
4. Homemade Heart Bath Bombs
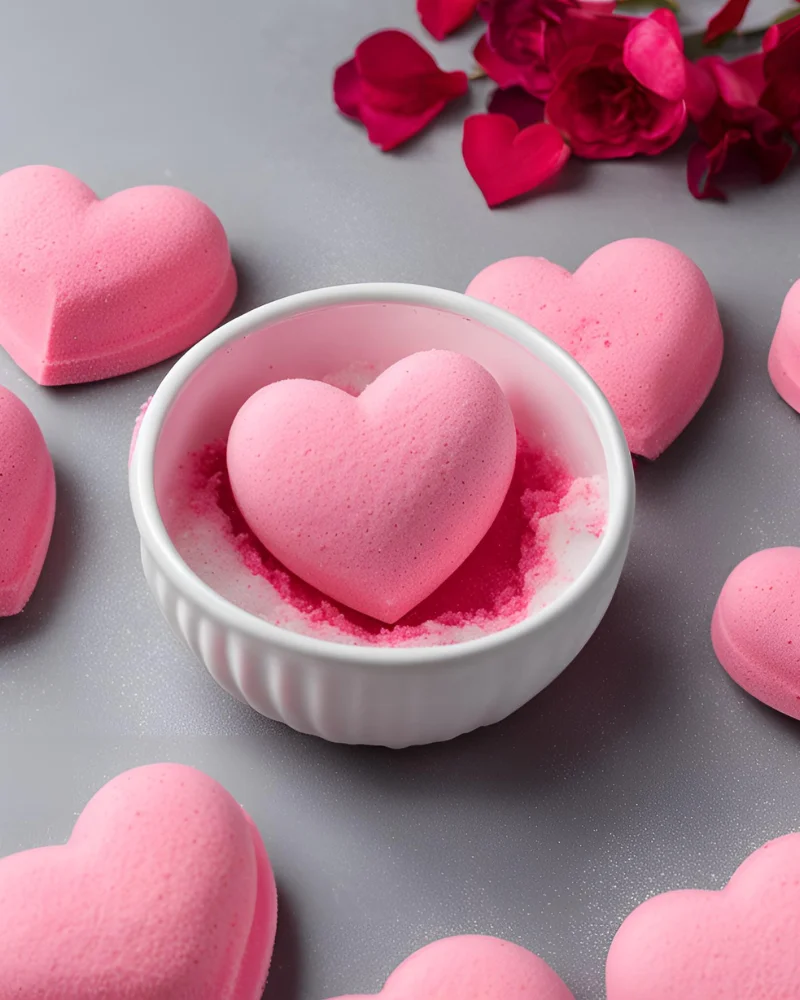
Bath bombs are trendy again! But no need to shell out the big bucks for fancy ones from the store when they are so easy to make at home! These personalized bath bombs let you customize scents and colors for a truly special self-care gift.
Safety Notes
- Adult supervision is required for measuring and mixing
- Keep ingredients away from eyes and mouth
- Use skin-safe colorants only
- Work in a well-ventilated area
Materials
- 1 cup baking soda
- 1/2 cup citric acid
- 1/2 cup Epsom salts
- 1/2 cup cornstarch
- 2-3 tablespoons coconut oil (melted)
- 8-10 drops essential oil (optional)
- Plant-based food dye (optional) (highly recommend this option from 365 by Whole Foods if using dye since this won’t dye your skin or your tub)
- Heart-shaped silicone molds
- Mixing bowls
- Measuring cups and spoons
5. DIY Heart Garland

Do you have some old shipping boxes lying around? This is the perfect DIY gift! Create a beautiful and easy Valentine’s Day garland using yarn, string, and cardboard hearts.
Safety Notes
- Parents of young children should use the darning needle to sew cardboard hearts together
- Keep sharp tools away from children
- Use caution with scissors
- Work on a clean, flat surface
Materials
- Yarn (red, white, and pink suggested)
- Cardboard from shipping boxes
- Scissors
- Heart template
- Large darning needle
- String for hanging
- Optional: glue
6. Homemade Chocolate Bars with Handwritten Wrappers

Create personalized, mouthwatering chocolate bars with custom toppings and adorable homemade packaging. Using a silicone chocolate bar mold with a little bit of coconut oil makes this DIY project a lot easier.
Safety Notes
- Adult supervision is required for melting and pouring chocolate
- Use caution with hot materials
- Keep workspace clean and sanitized
- Watch for food allergies
Materials Needed
- Chocolate (semisweet, milk, or dark)
- Silicone chocolate molds
- Double boiler or microwave-safe bowl
- Brown craft paper (3.5×8 inch strips)
- Cellophane bags
- Red or brown construction paper
- Choice of toppings
- Optional: roller stamp, tape
7. Paper Valentine’s Day Fortune Cookies

These paper fortune cookies are so cute and so easy! Create adorable paper fortune cookies for Valentine’s Day, perfect for kids and adults alike. Use them as an alternative to traditional greeting cards, to send secret messages, or hide little candies.
Safety Notes
- Supervise the use of scissors
- Use appropriate child-safe glue
- Keep small pieces away from young children
Materials Needed
- Colored/patterned paper
- White paper strips for fortunes
- Pencil
- Scissors
- Glue stick
- Colorful pens
8. Pressed Flower Lanterns
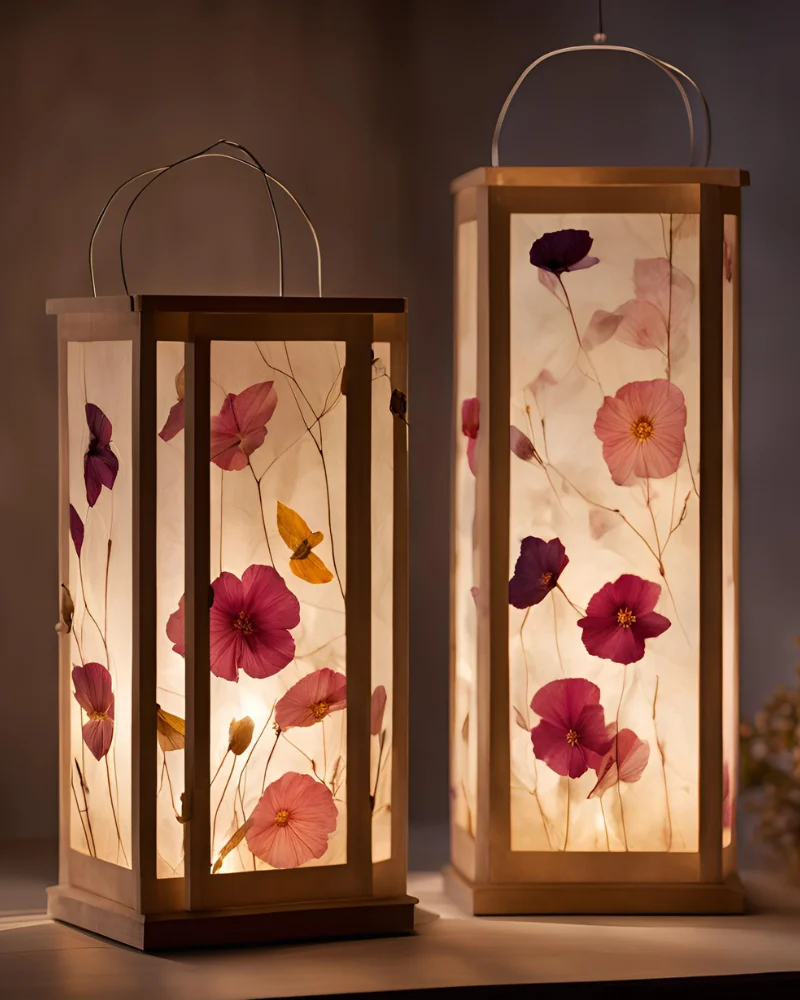
Transform plain glass jars into beautiful, classic lanterns using dried flowers and Mod Podge perfect for along the mantle or a festive Valentine’s Day dinner. This is a great way to repurpose glass jars, especially little glass yogurt jars if you have them.
Safety Notes
- Adult supervision for handling glass
- Work in a well-ventilated area
- Use battery-operated tea lights for safety
- Keep Mod Podge away from eyes and mouth
Materials Needed
- Dried flowers or pressed leaves. (If you don’t have flowers for pressing you can also purchase dried flowers.)
- Glass jar (Oui jar or mason jar)
- Mod Podge (matte finish recommended)
- Paintbrush
- Tweezers
- Battery-operated votive or tea light
- Optional: ribbon or twine

Epic Crafts For Kids (Age 11-16)
9. Heart Shaped Lavender Sachets

This idea is great for repurposing old dish towels, sheets, or pillowcases. Such a lovely addition to any drawer or displayed on a vanity. You can add a ribbon to hang these as decorations on door handles, or bureaus, or even a couple could be cute hanging from your chandelier.
Safety Notes
- Careful handling of needles and scissors
- Adult supervision for younger sewers
- Keep lavender away from pets
- Work in a well-ventilated area
Materials Needed
- Repurposed fabric scraps
- Scissors
- Needle and thread
- Dried lavender buds
- Measuring tape
- Heart template
- Optional: ribbon for hanging
- Stick pins
10. Pink Decorative Wreath

Dried pink bunny tail grass makes this DIY wreath so fun for the Valentine’s Day holiday. You can even leave it up for springtime! You could also use natural bunny tail grass with a pink ribbon for a more neutral color palette.
Safety Notes
- Use proper ventilation when painting
- Handle sharp stem ends carefully
- Secure workspace for glue work
- Keep materials away from the face and eyes
Materials Needed
- 140+ Pink Bunny Tails (Lagurus Ovatus)
- 12-inch straw wreath form
- Acrylic paint (pink)
- Strong craft glue
- Matching pink ribbon
- Optional: cotton string
11. DIY Clay Heart Ornaments
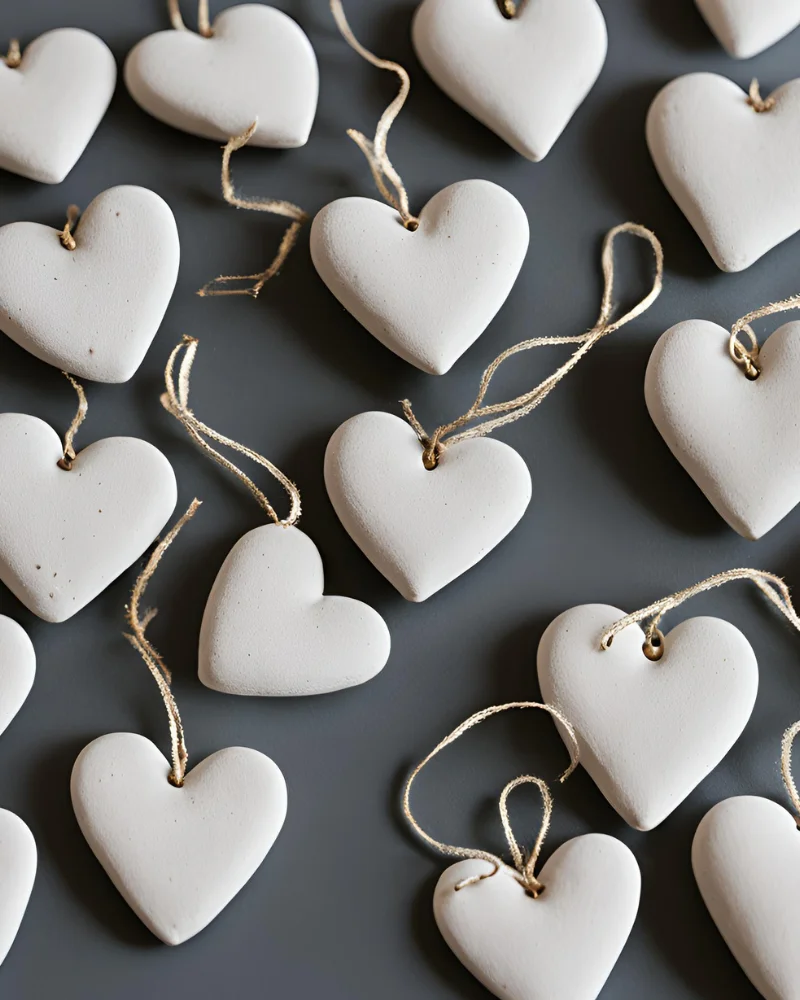
Yes, you can make your own air-dry clay at home using non-toxic ingredients! This homemade air-dry clay is perfect for crafting and modeling. And perfect for replicating those little candy heart messages so you can keep them forever.
Safety Notes
- Adult supervision is required for stovetop work
- Keep heat at a medium level
- Use caution with a hot mixture
- Ensure proper ventilation
Materials
- 2 cups baking soda
- 1 cup cornstarch
- 1¼ cups cold water
- Medium saucepan
- Spatula or wooden spoon
- Airtight container
- Parchment paper
- Optional: food coloring, acrylic paint
Tips For Creating a Safe and Fun Crafting Space
Your crafting area doesn’t need to be Pinterest-perfect – your kitchen table will work just fine! What matters most is:
- Having enough space for everyone to work comfortably.
- Good lighting so little eyes can see details clearly.
- Easy access to supplies without reaching or stretching.
- A washable surface or tablecloth you don’t mind getting dirty.
It helps to keep supplies organized in clear containers and set out only what you need for each project. This simple step prevents overwhelming younger crafters and makes cleanup so much easier.
Safety First
Safety isn’t just about avoiding accidents – it’s about creating an environment where kids feel confident to create. Here are some easy guidelines to follow:
- Little ones get child-safe scissors and keep a close eye on them as they work.
- Older kids can use regular scissors but be sure to discuss proper safety handling.
- Hot glue guns are for parent use only (or with close supervision for teens).
- Everyone wears old clothes or craft aprons.
- Hand washing happens before and after crafting.
Choosing the Right Materials
Having quality non-toxic art supplies make a big difference in both safety and project success. Here’s what to look for:
- Non-toxic art supplies that are clearly labeled for children.
- Materials are sized appropriately for small hands.
- Sturdy items that won’t break easily.
- Natural alternatives when possible (like water-based paints).
Be sure to store everything in a cool, dry place out of direct sunlight, and always check expiration dates on glue and paint. When possible, choose eco-friendly options – it’s a small way to show love for our planet while keeping your kids safe.
This has been your guide to homemade Valentine’s Day Gifts to make with your kids.
So this Valentine’s Day, embrace the messy, glittery, wonderfully imperfect magic of crafting with your kids. Will your kitchen table look like a tornado hit a craft store? Probably! Will your little one’s pink hearts come out wonky? Almost certainly.
But when you see the lopsided grins and the sparkle of pride in their eyes as they hold up their masterpieces, you’ll know it was all worth it.
Because here’s the beautiful truth- it’s not about creating the most Pinterest-worthy projects. It’s about the laughter, the love, and the memories you’re stitching together, one little creation at a time. Those are the real treasures – the ones that will last long after the last paper scrap has been swept away.
Check out our other amazing kid-friendly articles:
- Non-Toxic Crayons & Markers
- Non-Toxic Art Supplies
- Non-Toxic Nail Polish
- Non-Toxic Candles
- Non-Toxic Makeup
- Non-Toxic Jewelry
Like It? Pin It!